
Looking for a budget friendly way to makeover your old brick fireplace? Here’s a step by step guide showing our brick fireplace makeover DIY.

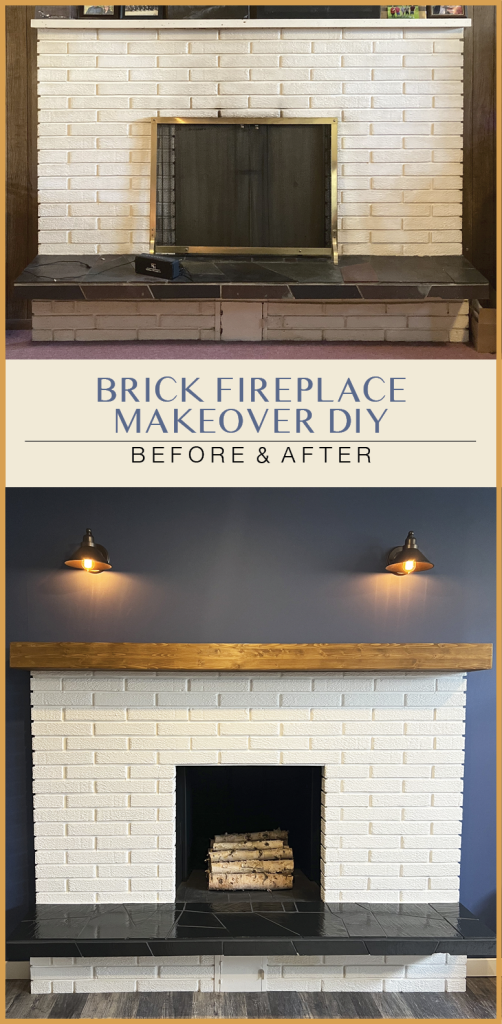
The Dated Brick Fireplace
This is how our old fireplace (and basement) looked when we first moved in. We live in an old house, built in the 1960’s with so much character. We removed the old paneling and carpet first, laid new floors, drywalled, and replaced the lighting before our outdated fireplace could receive a fresh look. This is a perfect brick fireplace makeover DIY for anyone on a budget.
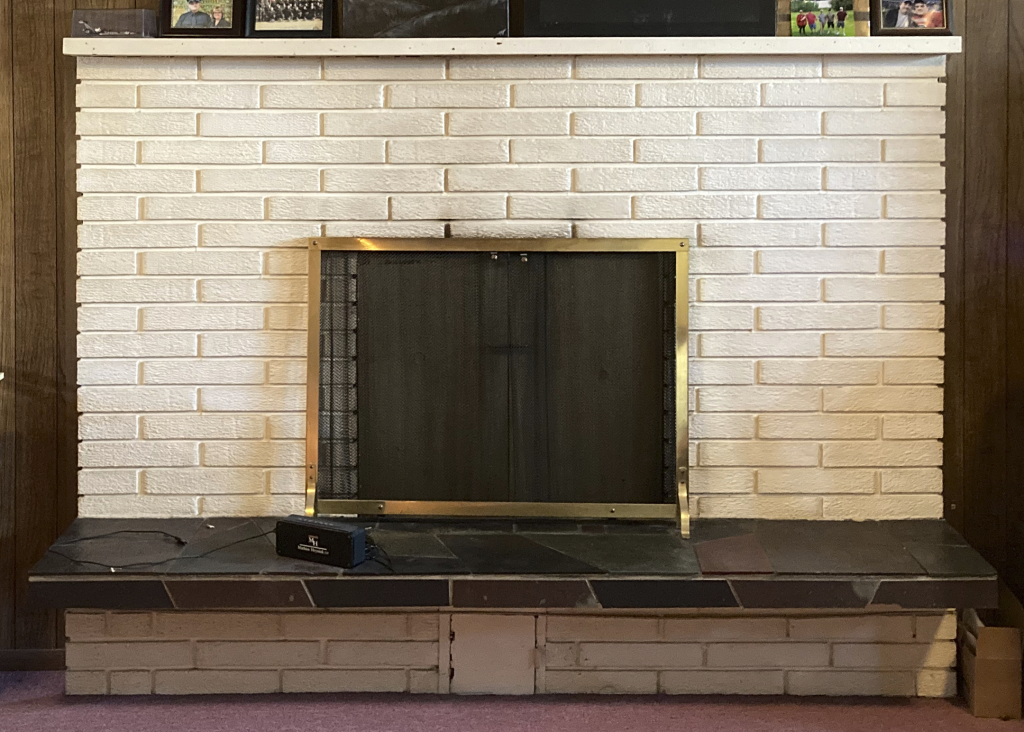
The chimney opening has collapsed over the years, so this fireplace is unusable unless we install a gas fireplace insert, or electric insert, which might happen down the road. For now it is purely for visuals. Keep this in mind as I painted the hearth with non-heat resistant chalk paint. Ignore these steps if your fireplace is usable, just stick to painting the brick on the fireplace surround. Follow all your local fire codes whenever remodeling your existing fireplace.
Brick Fireplace Makeover DIY
I gave the entire fireplace an updated look with fresh paint on the brick and ceramic tile hearth, and a new mantel. Since the fireplace is the focal point of our basement living room area, this diy project made a big difference to the entire room, and gave it a more modern look. Here are the steps I took. You can use these same tips when painting a real stone fireplace.
STEP ONE: Painting the Brick
How to paint a brick fireplace with white paint
Painting your fireplace is a great way to update your living space. Generally, it’s the cheapest way to give your old brick fireplace a whole new look. The original red brick fireplace was painted white and stained from use. The first thing I did after the room renovation was complete was give the existing brick a fresh coat of paint. Here’s a step by step process showing you the best way to prep and paint your brick fireplace (pre-painted or not):
1. Give it a good scrub down.
If it’s a wood burning fireplace there may be a lot of smoke build up settled onto and into the brick. You won’t be able to scrub all of it off, but getting as much off as possible is the key to long lasting adhesion and durability of your paint over time. Even if your fireplace isn’t wood burning, it is still a good idea to scrub off any dust and dirt. I used a TSP cleaner, which is a concentrated degreaser that also dulls and preps a surface for painting. I diluted it in water (as per the instructions) and scrubbed down each brick with a rag. Some TSP formulations require rinsing and some are rinse free. Either one will work, it’s more your preference. TSP can usually be found at any paint store, home depot or your local home improvement store. This is the tsp I used.
2. A coat of good primer.
Choosing the right primer for the job is very important. Eventually, using the wrong primer can lead to issues down the road (peeling, yellowing, etc). Double check the label and small print. Make sure it is a stain suppressing primer/sealer that can adhere to brick (or in my case, previously painted surfaces). I used an old paintbrush I had on hand to apply the primer, making sure to get into the texture of the brick and between each one. If you don’t have an old brush just use something inexpensive. The brick will ruin a nice brush. Follow the recommended dry time on your can of primer. I used Benjamin Moore’s Fresh Start Undercoater & Primer/Sealer.
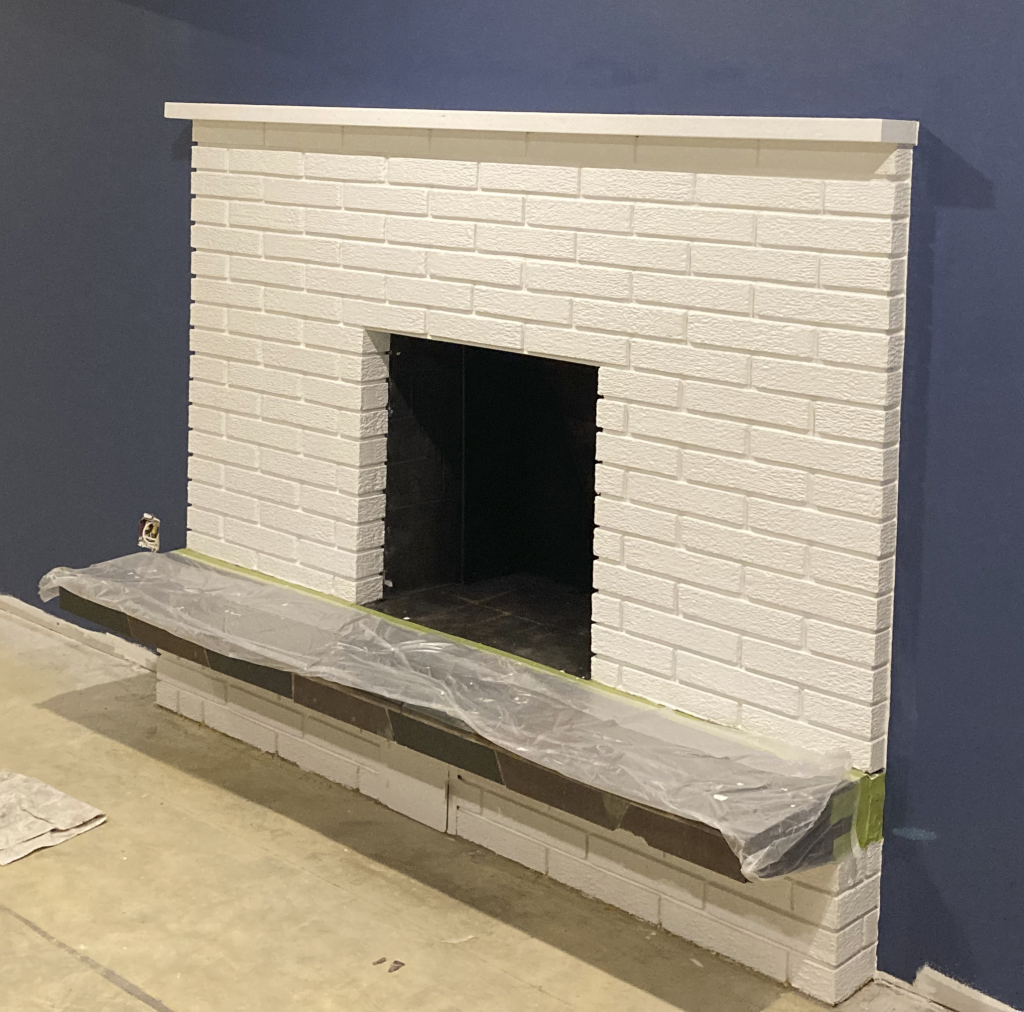
3. Two coats of paint.
I applied two coats with another old brush. I used Benjamin Moore’s Regal Select in the colour OC-151 White, eggshell finish. The eggshell finish is almost flat, but still wipeable. You can really do whichever finish you like (semi-gloss is shiny, flat is more matte), just keep in mind if you scrub down your fireplace often a higher shine finish will last a long time, where a matte finish might not hold up as well. Depends how often you’ll be needing to clean it, and how high quality of paint you choose.
STEP TWO: DIY Wood Fireplace Mantel
How to build a fireplace mantel from scratch out of wood
The original mantel was just a two by four that was painted white. It was well secured so I decided it would be a great structural support for the new mantel. I picked up a sheet of 3/4″ project panel from The Home Depot. It’s a laminated sheet of wood, which gives the mantel a solid wood look, but without the cost and risk of warping/cracking over time that solid wood would have. Here’s how I went about creating the wood mantle:
1. Frame for your new mantel.
I screwed scrap 3/4″ material into the top of the original mantel. Then, added another two by four to the front of the original mantel, and attached it with long screws. Additional 3/4″ scrap material was added to the bottom with screws. With the new framing and project panel, the depth of the mantle became 7-3/4″, and a height of 4-1/2″. These dimensions looked much more proportionate than before.
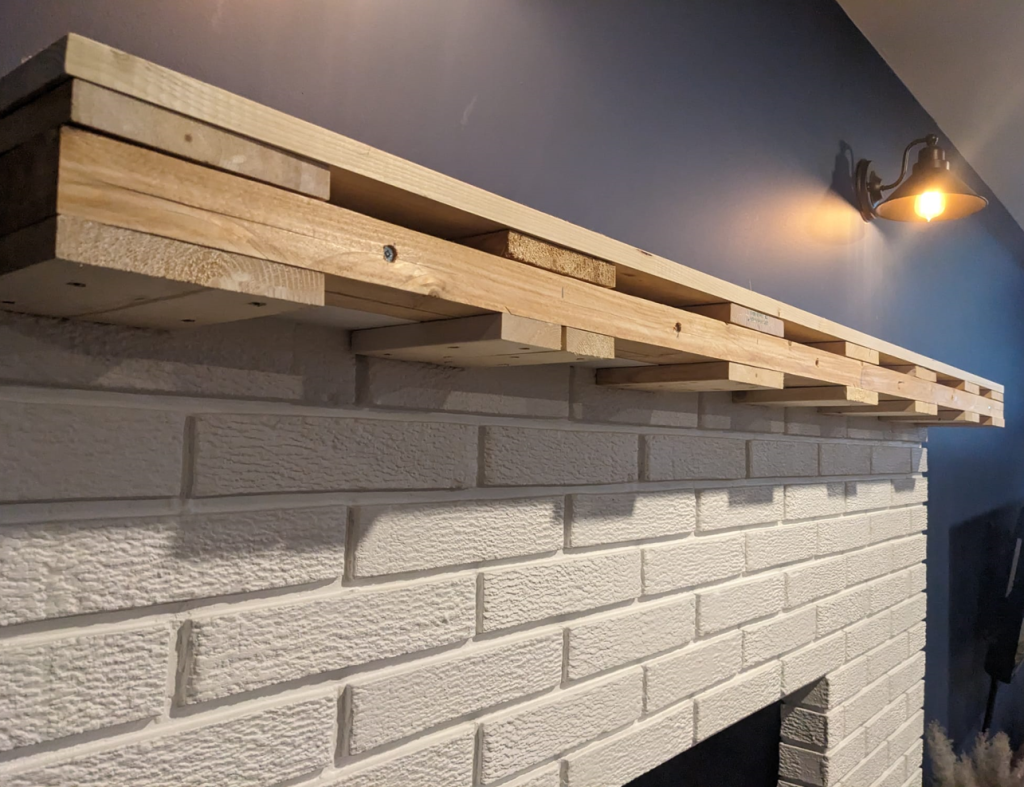
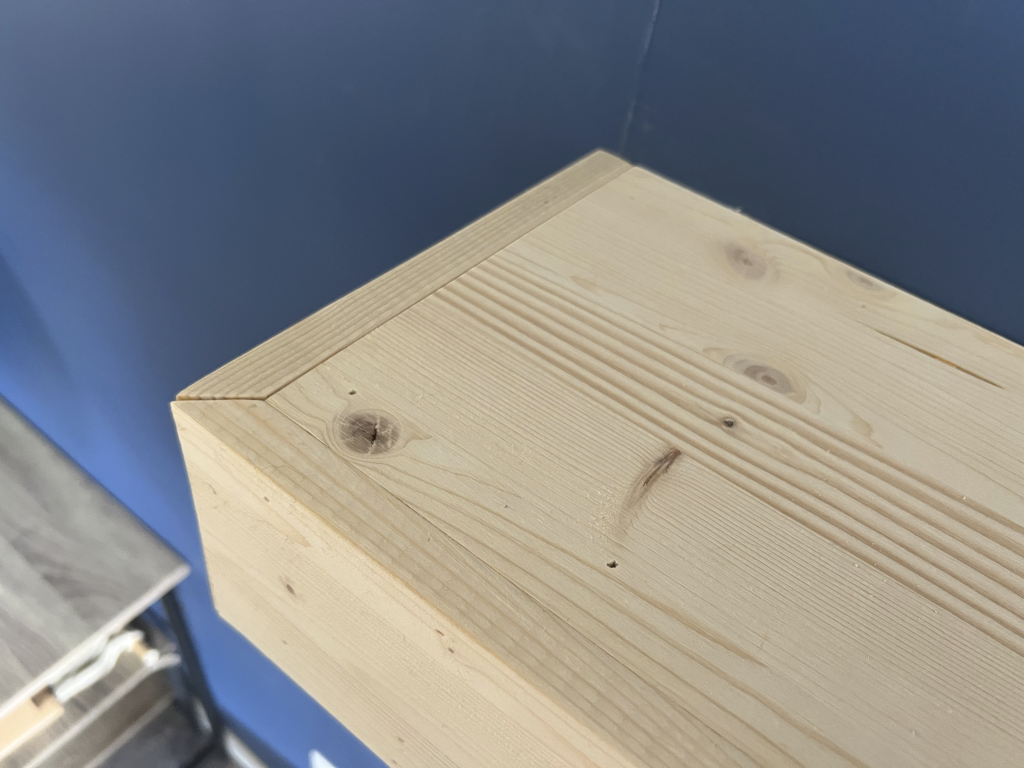
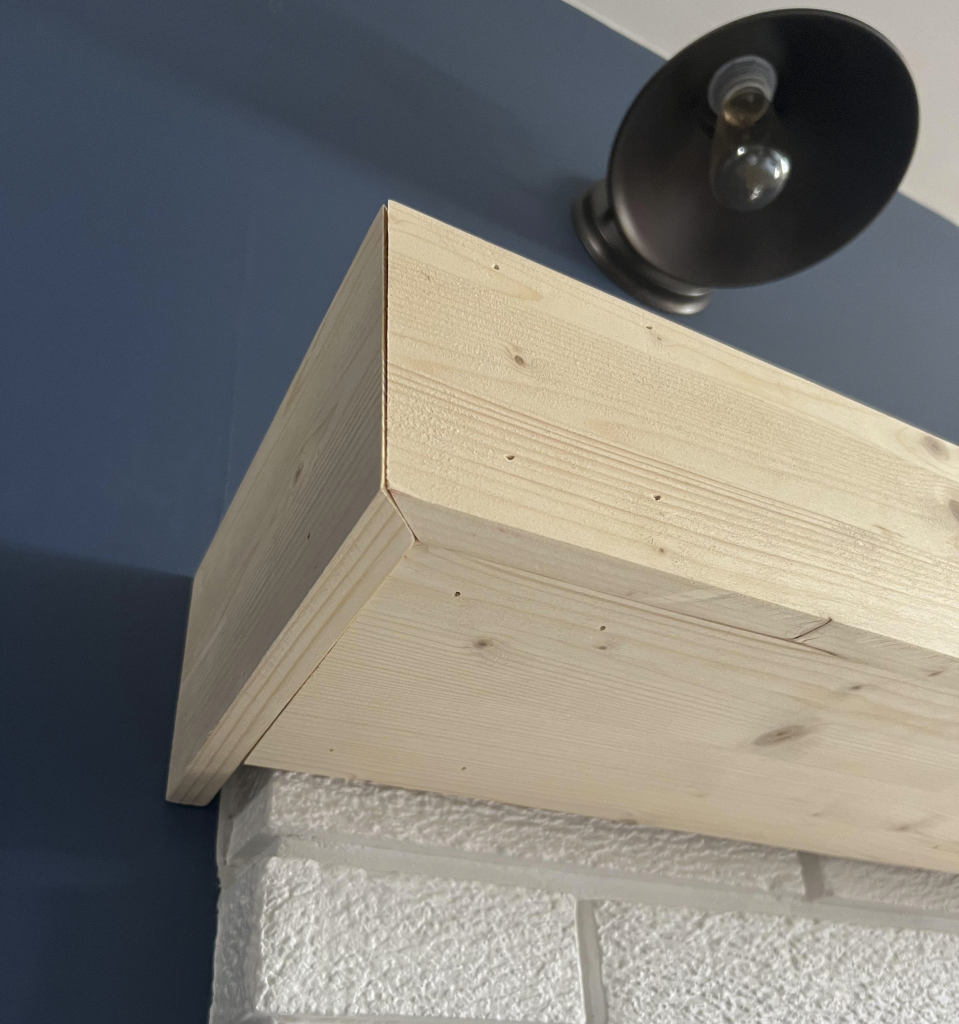
2. Cut and attach the project panel.
I attached the project panel to the framing with finishing nails and glue. First, I attached the top and bottom panels, and then the front and side panels with mitered corners. Mitering the corners makes the mantel look more like a solid piece of wood. Mitering is when you cut the finished wood corners on an angle, so they can be attached together more seamlessly.
3. Use wood filler on the nail holes.
This step can’t be forgotten! It’s what gave my mantel a professionally finished look. Use a wood filler that is a similar tone to the wood before it gets stained, and make sure that it can be sanded and stained. It doesn’t take much filler to cover all the nail holes. I used a small putty knife, trying to make the filler as smooth as possible to save me extra sanding time. I made sure to tape off around the mantle and use plastic to avoid getting sanding dust everywhere. The tape also protects the walls and the bricks when you start staining.
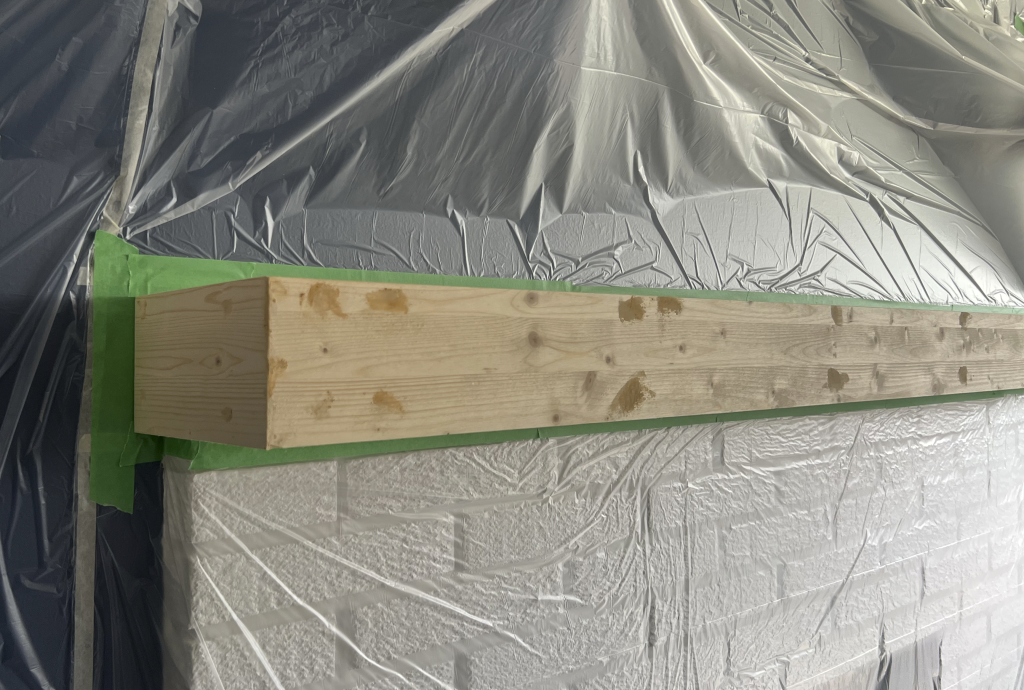
4. Sand it down.
Sanding is not my favorite thing to do, however it’s a necessary evil. Without proper sanding your mantel will have a rough finish and the stain won’t absorb evenly or properly. I started with an 80 grit sandpaper, which is rougher. After that I went in with a 120 grit and then a 150 grit. Slowly decreasing how rough the sandpaper is each round gives the wood a smoother finish.
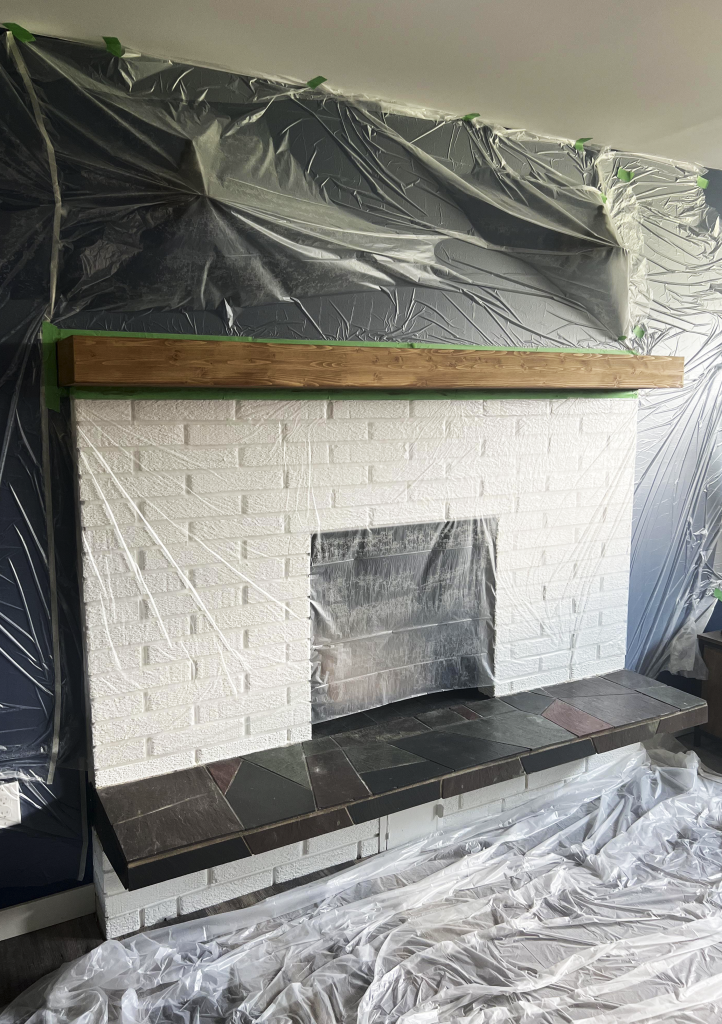
5. Stain and protect your mantel.
I used Saman One Step Wood Stain & Varnish in the colour Dark Chestnut. This is an amazing product because you can accomplish stain and protection all in one go. This product dries fast so I worked quickly to get the product on evenly. I used a wide sponge brush and applied two coats. Additionally, I have used this product on other projects and I find it very durable. Afterwards, once the stain dried I removed the painters tape and plastic.
STEP THREE: Painting Fireplace Hearth Tiles
How to paint ceramic tile with chalk paint
I’ll mention it again here, this method of painting your hearth is only recommended for decorative fireplaces only. Certainly, do not paint your hearth this way if you actively burn wood, or there is any heat coming from your fireplace. It can be a fire hazard. Here’s the steps I took to update the tiles with chalk paint.
1. Wash down the tile.
I used the TSP cleaner again. This helped degrease the tiles, and dull the finish a little which helps the primer stick to it. Allow the tiles to dry fully before moving to the next step.
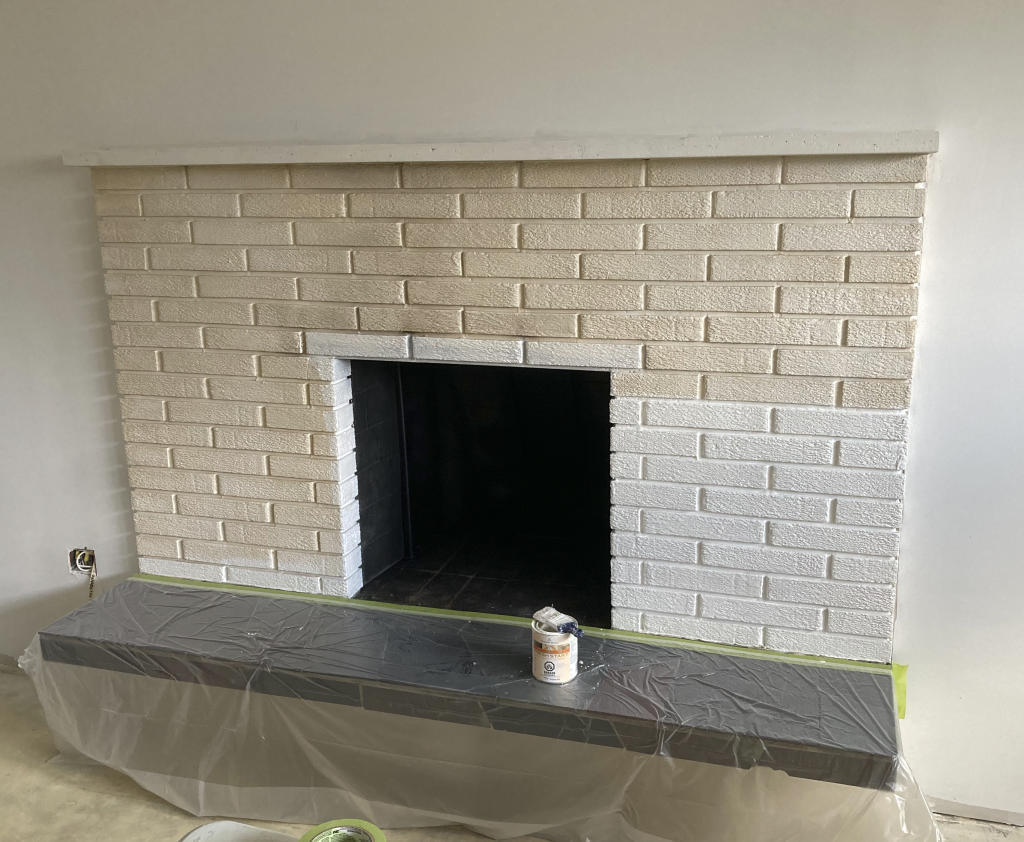
2. Prime the tiles and grout.
You can use painters tape here if need be, but I didn’t need to. Any synthetic brush will work, just be careful not to brush too vigorously or you’ll splatter primer on your wall (I learned that the hard way). Gently apply one coat. Primer doesn’t need to be full coverage, just as long as there’s an even coat. You’ll see in my photo that the black tile is still visible through the white primer. I used Zinsser Bulls Eye 1-2-3 Primer for all surfaces. This primer also boasts adhesion to smooth surfaces (like ceramic) without sanding. So far it’s held up great!
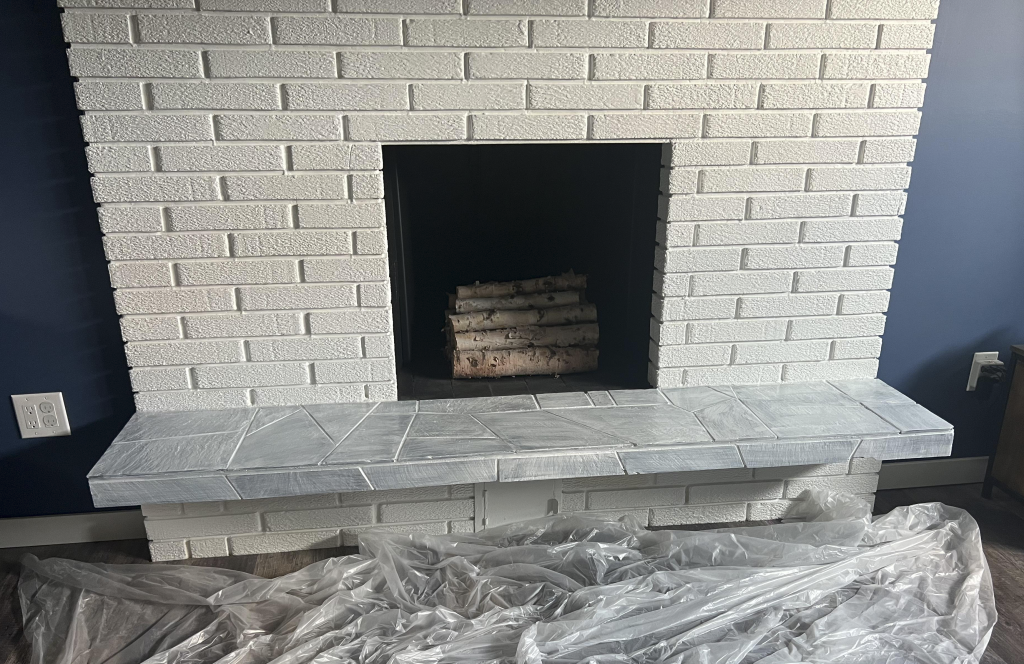
3. Apply two coats of chalk paint.
I used a generic synthetic angled painters brush, making sure to cover all the tile and grout lines. I used Rustoleum Chalked in the colour Charcoal.
4. Apply two coats of topcoat.
The glossy top coat makes the chalk paint extremely durable and basically makes the painted tile look real. I used Minwax Interior Oil Based Polyurethane in a gloss finish. Top coat typically requires two coats, which I applied with a small foam brush. I only coated the tiles and not the grout lines, to create contrast and a real look.
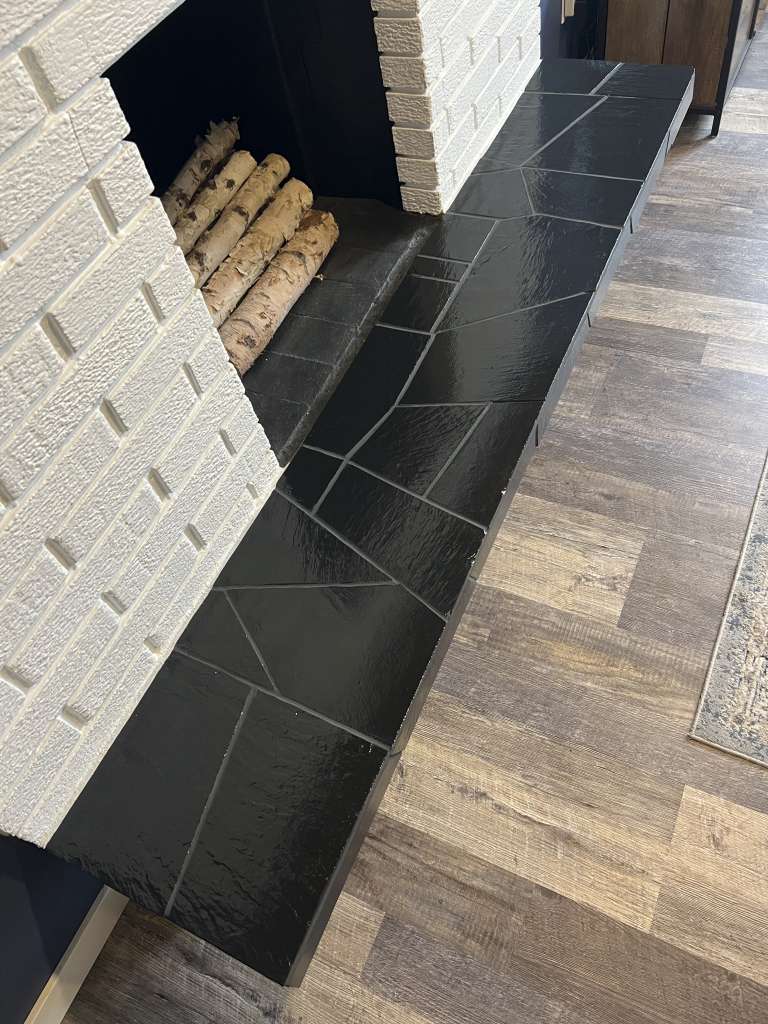
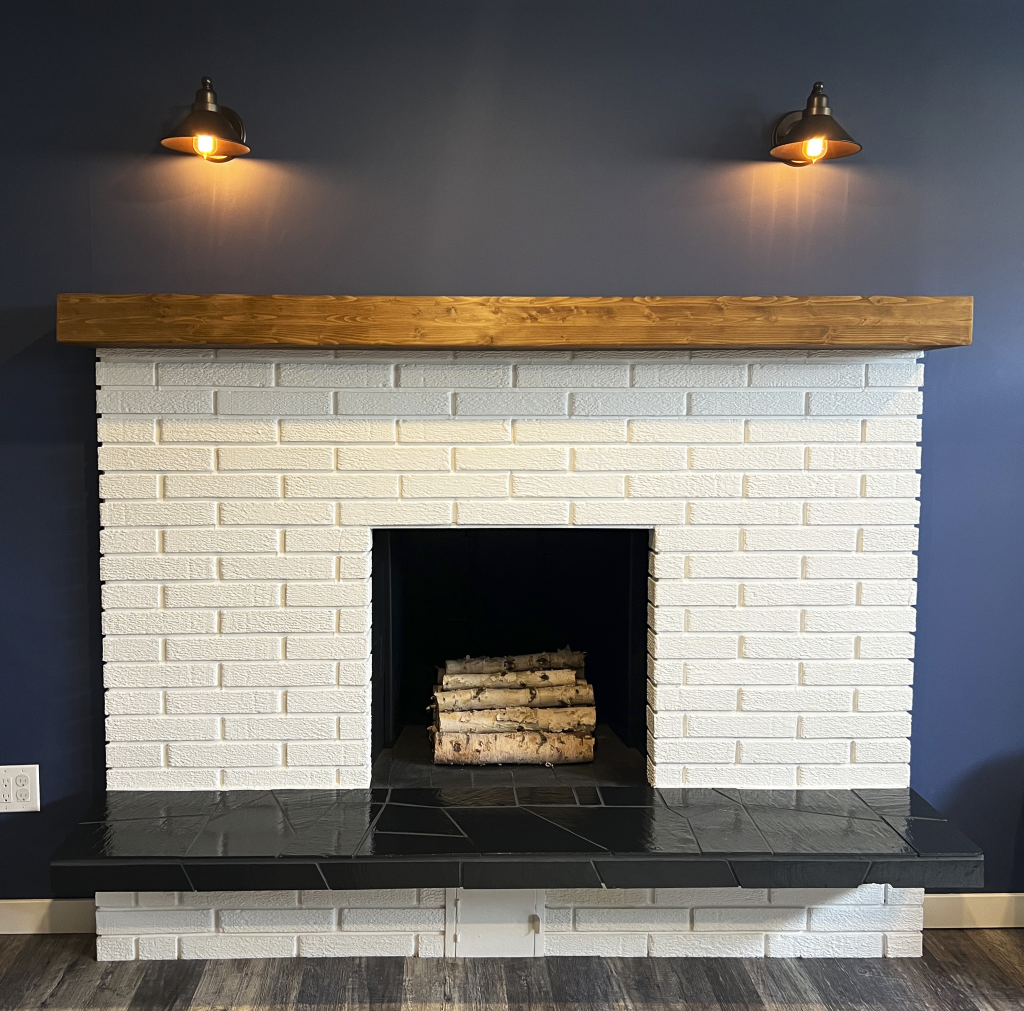
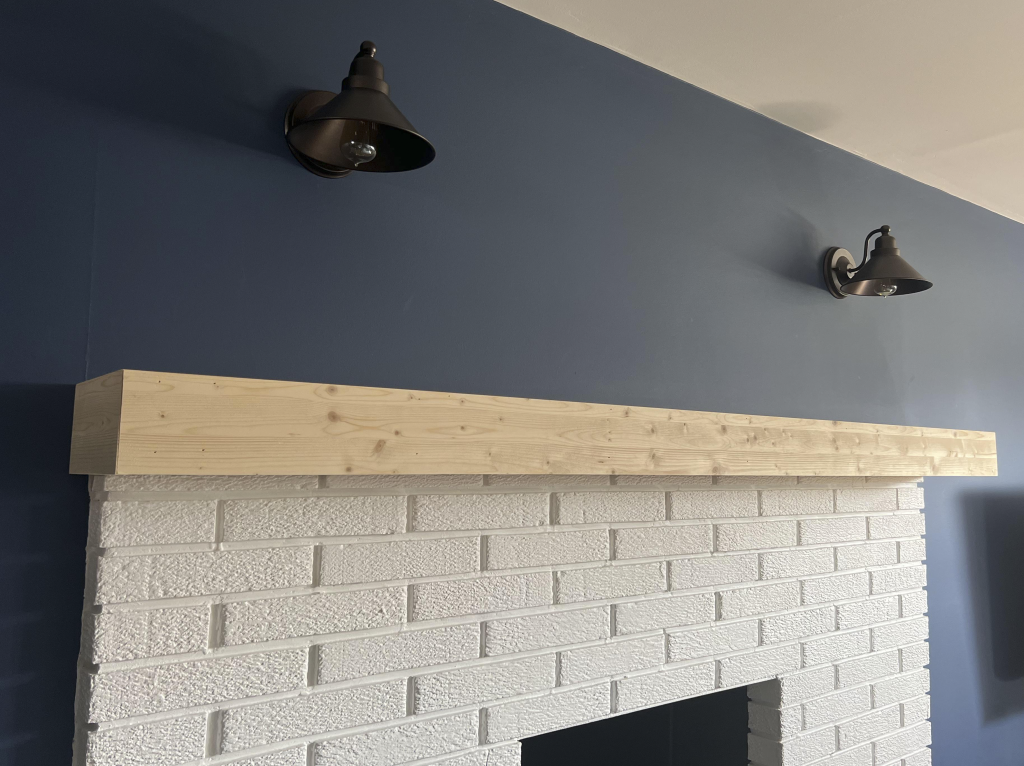
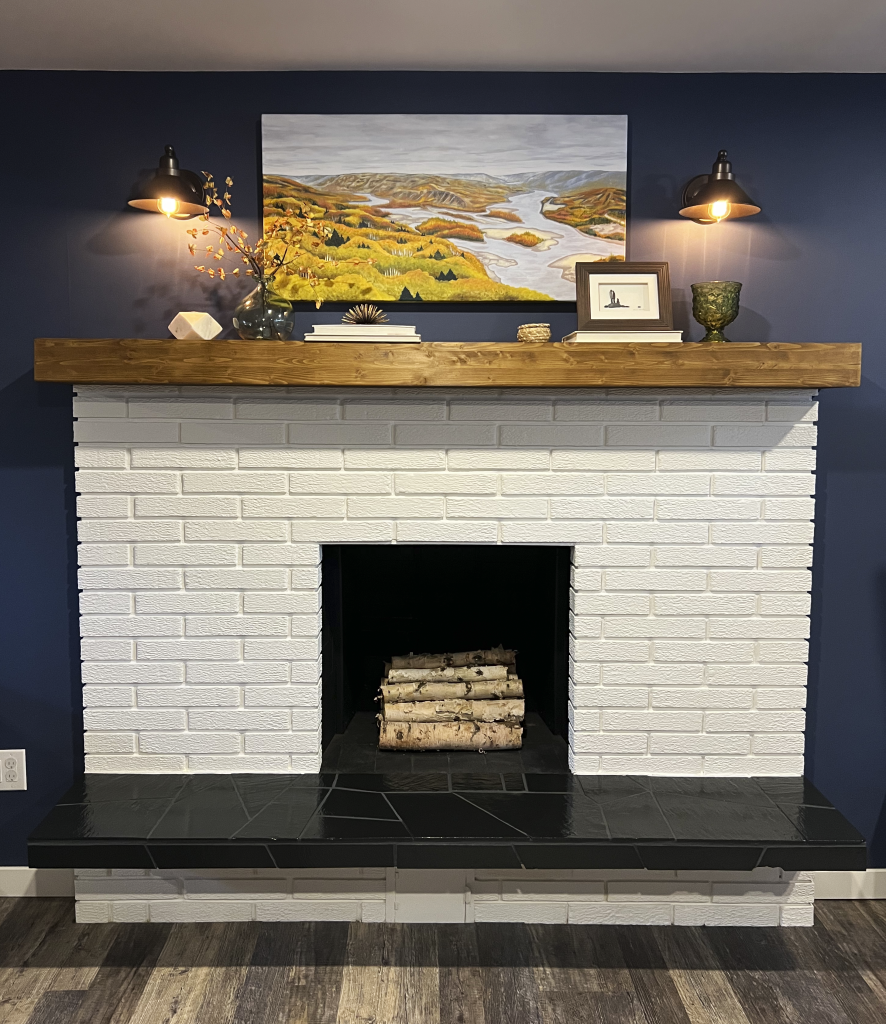
The final Brick Fireplace Makeover DIY
Finally, with minimal effort our fireplace was transformed in an extremely cost-effective way. I hope you feel inspired and empowered to tackle your own brick fireplace makeover diy projects! Especially if it means having a beautiful fireplace, and a space for you and your family to enjoy and feel proud of.
Pin It for later
Beautiful transformation! Thanks for sharing!!
Thank you so much!
Hello! I simply would like to offer you a huge thumbs up for the great information you have right here on this post. I will be coming back to your blog for more soon.
Thank you so much!